Windows 10 100% disk usage in Task Manager — what causes this problem and how to solve it?
Computer freezes are often caused by using an old version of Windows. But users of brand new Windows 10 computers can also encounter this problem. A cursory look at the situation reveals that the cause is 100% of the hard drive load. This seems unbelievable, especially if you only have a few standard programs running. But recent Windows versions have a problem with increased load on the disk, slowing down the entire operating system. It applies to regular hard disk drives (HDD) and solid-state drives (SSD). So we will tell you about the causes of this problem and the ways to solve it.
How to fix this error?
When the problem is detected, the user has several available options. Perform the following steps one by one, checking the disk loading status indicator in the Task Manager. Note that the Windows Update Center with the regular patches may reset the changes made even if a solution is found. So you’d better keep all the instructions below.
Run a disk check
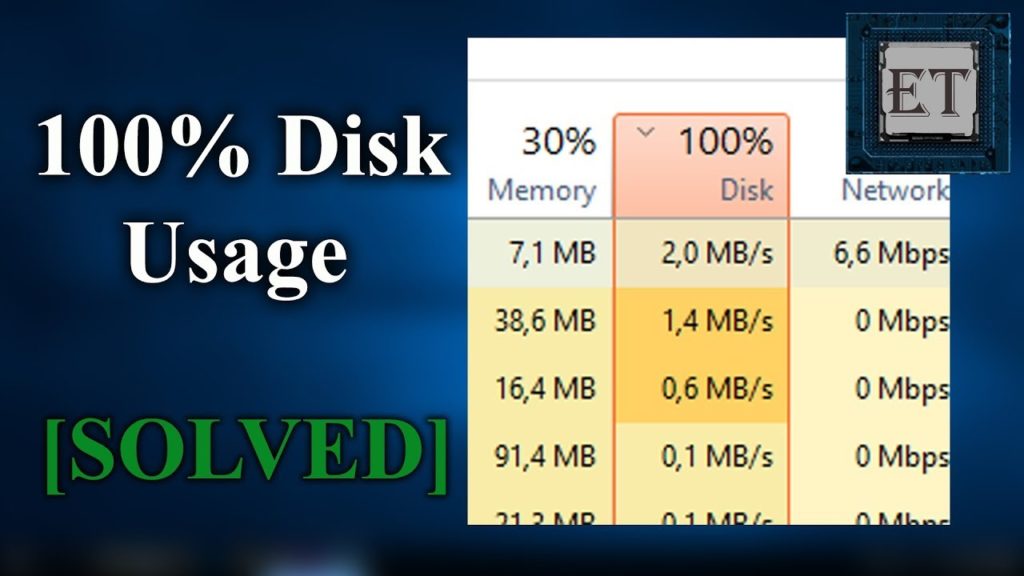
Performance problems often occur when using Windows Search to find a file or program or perform any operation requiring the disk to do some work. This could be copying or pasting a group of files. To determine if the problem affects your computer, press the Ctrl + Alt + Del key combination and select the Task Manager the next time your computer slows down. There is another way. You can right-click on the taskbar and select the Task Manager there. Displaying information about the disk loaded with tasks may take some time.
You can see the “Disk” column on the “Processes” tab. If there are real problems with its performance, the load is at 100%, and the upper field is colored red. Problematic sectors on the hard drive may cause this problem. But this situation can be solved by using the built-in Windows disk checker:
- Open Explorer and select “This computer” in the left column.
- Then find your hard drive on the right side of the window.
- Right-click on the C: drive and select Properties.
- Click on “Check” under the “Services” tab.
- Click on “Scan disk” in the window that appears. Wait for the system to check the drive. You may need to reboot the system to complete the tests. But this operation eliminates the drive error.
Check the state of your computer with an antivirus
You should first ensure your system is protected against viruses, as in any case of poor computer performance. The malware may interfere with the performance of your PC. The software protecting your computer must resist threats, whether the application is free or paid.
Special tools, such as Malwarebytes Anti-Malware, can scan your system drive and detect the causes of abnormal load. But this work takes some time. When threats are detected, follow the recommendations of the antivirus manufacturer to fix the problem. Then reboot the system and recheck the disk load. If the problem is not solved, it is not related to malware. Let’s move on to the next steps.
Disable Windows Search to improve disk performance
You need to check if the 100% disk load problem is not related to the Windows Search service operation. Besides, a bug in Windows 10 caused the search to loop. It results in an increased load on the system disk.
To stop the service and prevent it from running during the current session, open the command line (click on Start and type “cmd” in the search window), then right-click on the Command Line, and select “Run as administrator” before restarting the program. Enter the following command: net.exe stop “Windows search.”
Press Win+R, type “services.msc“, and then press Enter to disable the Windows Search permanently. Find the Windows Search item in the Services window and double-click it to open the service properties. Select “Disabled” in the “Startup type” field. You can also stop the service in this window. Just click OK to save the changes. Windows 10 performance will improve a few seconds after disabling Windows Search. If this method does not help, move on to the next step.
Disable the Superfetch service
The Superfetch service is another possible cause of the excessive disk load in Windows 10. To fix the situation, open the command prompt (the window may remain from the previous step) and type net.exe stop superfetch. Wait a few minutes to see if it affects disk performance, then run a disk check at the command prompt: chkdsk.exe /f /r.
The computer will restart to complete the disk check. Please make sure all applications have saved their data and can be closed. If this method does not help, the problem is more complicated than it might seem. But we will try to solve it anyway.
Use another web browser
A browser may cause a problem if you use Google Chrome. No one prevents you from choosing another program for surfing the Internet. Moreover, Windows 10 has two built-in web browsers. Internet Explorer may seem outdated so Microsoft Edge can be an excellent replacement for Google Chrome. It is better to have several browsers because some are better than others.
Check Skype
This popular application can cause a 100% load on your hard drive. To find it out, you should start by checking the startup status of the program. You can do this in Task Manager or check the applications near the clock icon in the tray. If Skype is detected, you must quit it by right-clicking on the program icon and selecting “Quit Skype.”
Now press WIN + R and type the following address in the field: C:\Program Files (x86)\Microsoft\Skype for Desktop\ or C:\Program Files (x86)\Skype\Phone\. Press OK and find skype.exe. Right-click on it and select Properties. Click “Change” on the Security tab and choose packages for all applications.
Check the “Record” box in the “Allow” column and click “Apply,” then OK. Now you have to go back to Task Manager and see the changes. You can also change Skype to another messenger. If this method does not help, it’s time to move on to the next one.
Fix the bug with the PCI-Express driver
Some drivers in Windows 10 don’t work the way they should. The StorAHCI.sys driver is one of the firmware causing your hard drive to load 100%. This program is designed to work with storage devices connected to the motherboard of your PC or laptop via the PCI-Express extended host controller interface. Connecting such a peripheral can be problematic.
- Open Device Manager. You can find it in Windows 10 or by right-clicking the PC in Explorer and selecting Properties — Device Manager.
- Expand the “IDE ATA/ATAPI Controllers” branch. If you see an entry for the AHCI controller, double-click, open the “Driver” tab, and select “Driver Details.” If C:\Windows\system32\DRIVERS\storahci.sys is listed as the driver, a driver error may affect the functionality of your computer.
- Close the “Driver Details” window and go to the “Details” tab – select Device Instance Path from the drop-down menu. Place the cursor on the value, right-click, and select “Copy.” Now you should put this information into a text document (you can use Notepad for this).
- Now press WIN + R, type “regedit” in the Start panel, and press OK. Go to HKEY_LOCAL_MACHINE\System\CurrentControlSet\Enum\PCI\ and find the line copied earlier without a random number at the end to open your AHCI controller branch.
- Now open the folder with that long random number and expand the Device Parameters\Interrupt Management\MessageSignaledInterruptProperties branch. The MSISupported item will appear in the right panel. Double-click on it and change a value to 0. Now click OK to confirm. You have to restart Windows to apply the changes.
Clear the Steam cache
Do you like to play games and use the Steam service? This system can cause problems with the constant load on the disk due to the delivery of updates, slowing the background loader. You need to clear the Steam cache to fix the problem. To do this, follow these steps:
- First, make sure you are logged out of Steam. If this program causes a problem with the load on the disk, it may freeze when you try to exit. In this case, use the Windows 10 Task Manager to close the Steam client.
- You can now open the startup window using the WIN + R key combination and type the steam://flushconfig command.
- You will see a dialog window informing you about deleting the content. It is necessary to confirm your decision by clicking OK. The games and all the saves will remain on the disk, and there is no risk of losing them.
Disable diagnostic tools in Windows
It’s also worth considering the impact of Windows 10 diagnostic tools. Many users disable this feature for privacy reasons. But diagnostic tools can also cause abnormal load on the hard drive disk. In this case, just disable the DiagTrack service. It can solve the problem with 100% disk load. But first, you need to access the command line in Administrator mode. This can be done as follows:
- Click the Start button and type cmd in the search box. Wait for the search results, right-click on the Command Prompt and select the “Run as administrator” menu.
- In the window that appears, enter the following command to stop and disable all diagnostic tools: sc config “DiagTrack” start=disabled, then press Enter.
- Enter the sc stop “DiagTrack” command and press Enter.
You can also adjust notifications in the Settings — System menu and disable getting tips, advice, and hints when using Windows. It may help with disk load problems.
Windows Update Center
Any Windows user is aware of the need to update the system. But changes to the operating system can cause a 100% load on the disk. This usually happens when the problem occurs in the Windows Update Center. It may be a refusal to download the desired file. Then the user has two choices:
- Leave the computer for some time. Close all open applications and wait. The files will still be downloaded, but Windows may require a reboot, depending on the update settings of the system;
- Shut down the computer. After that, you can turn it on and wait for the Windows Update Center to fix the problem.
Once the update is finished downloading the files, start the installation process as soon as possible. As we mentioned above, new patches can cancel previous fixes. It is important to remember the patches being installed to undo them if the problem occurs.
Resetting virtual memory
Your computer’s virtual memory is a combination of RAM and hard disk space. Using such a scheme can cause the disk to be permanently loaded. If there is insufficient RAM to perform some tasks, it is replenished by the disk space. The data placed there is then returned to RAM, if necessary.
Virtual memory is used by default in Windows, and working with it may help solve the “disk is 100% loaded” problem. To start with, it is worth performing a reset:
- Use the WIN + Break/Pause combination to open the System window.
- Go to the “Advanced system settings” menu in the left column.
- In the “System Properties” window that appears, select the “Advanced” tab and click the “Settings” button.
- Go to the “Advanced” tab and find the “Virtual memory” section.
- Click “Change…” and uncheck the “Automatically manage paging file size for all drives” box. The paging file media is recommended on the same screen to select the disk with the installed system (usually C:) and custom size.
- Specify the Initial size and the Maximum size. Note that both parameters are set in MB, not GB.
After entering the values, click Set and OK to continue. Now delete the temporary files used in the previous virtual memory allocation from the system. To do this, open the “Run” window (WIN + R) and type “temp” there. It opens a directory with temporary files. Select them with the Ctrl + A key combination and click on Delete.
Activate high-performance mode
Changing the Windows power settings is one of the last possible steps in fixing problems. A disk load error may accompany the standard modes, but switching to a higher performance mode can solve the problem.
The increased power consumption is the only disadvantage of this solution. But this is not a severe problem for modern and efficient processors. This mode can reduce battery life in netbooks and powerful laptops acting as desktops.
Press the WIN + X key combination and select Power Management to switch to this mode. Select “Advanced power options” and “High performance” from the list.
If this option is not displayed, you must create your power plan. Select the option for creating power management schemes, click “High performance,” name your plan, add the necessary settings, and set it as your main scheme. The disk problem should disappear, and the load should drop from 100% to 10%.
Install the latest SATA drivers
Your Windows 10 computer uses SATA connections for hard drives, SSDs, and optical drives. You may get a disk usage error if the interface drivers are outdated. To avoid this, you need to update SATA drivers to their latest versions.
Use the WIN + X key combination and select Device Manager. Open the branch with storage device controllers and find your SATA device controller. You can update all options to avoid possible errors.
To update your controller, right-click and select “Update driver.” Next, you should choose the “Search for drivers on this computer” option and find a driver in the list. Here you should select “Standard AHCI controller” and see how that affects performance.
You may need to reboot Windows for the changes to take effect. You can check the manufacturer’s website for a new driver if this method doesn’t work. It can then be installed using the instructions.
Conclusions
There is no reason for the disk to be 100% loaded with tasks if the computer works in normal mode. An outdated platform may be a problem, so you must disable a browser’s plugins, stop services, or start antivirus software checks. But such behavior of the disk can also be caused by your computer’s hardware. The disk may be old and malfunctioning, or there is a need to replace the cables. The problem may also be related to the Windows defragmentation tool.
You may have a problem if your computer is trying to defragment a slow HDD drive. Open the Task Scheduler using the WIN + Q key combination and type this application’s name in the search bar. Disable all scheduled disk defragmentation tasks in this program.
Try all the methods mentioned above the next time Windows starts working slowly due to the constant load on the disk. Save the suggested fixes to solve your operating system’s most common problems.