How to connect two monitors to one laptop
Connecting two monitors to one laptop can be useful in various cases. For example, when you want to fully enjoy the graphics of the game or your profession is related to writing text or working with primary sources (this is much more convenient to do when the text editor and a primary source are displayed on different monitors). So we’ll tell you how to do it.
Check the cable connections
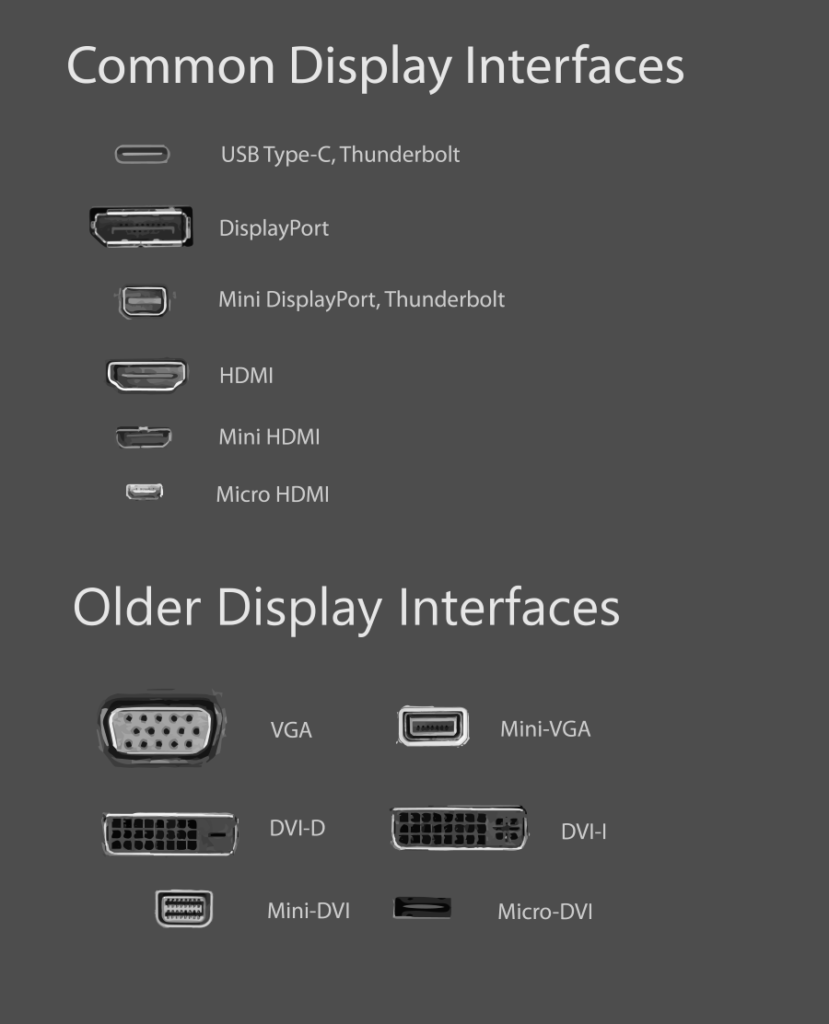
If you have a Windows laptop, connecting external displays should be very easy. The first step is determining the type of cable you need. Most modern laptops have HDMI, DisplayPort, mini-DisplayPort, or USB Type-C ports. If the inputs and outputs on your monitor and laptop match, you can purchase a cable and connect them.
Select the extension or duplication of the desktop in Windows
When you have a cable, connect it to your monitor and laptop. It is easy to do in Windows:
- On Windows 8, 8.1, or 10, press WIN + P to open the Project option, appearing in the menu on the right.
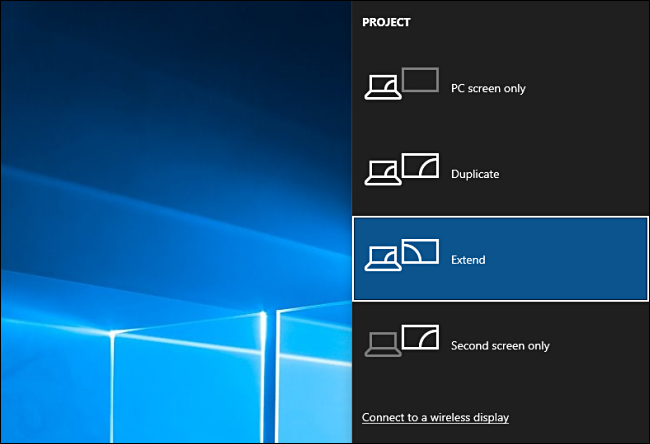
- Use Duplicate or Second screen to show a presentation through a projector or play a movie. You need the Extend option for working or playing games. This option allows you to spread the entire desktop across both screens and drag and drop windows and other items from one to the other.
Windows 7 users need to follow a different procedure:
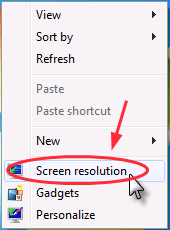
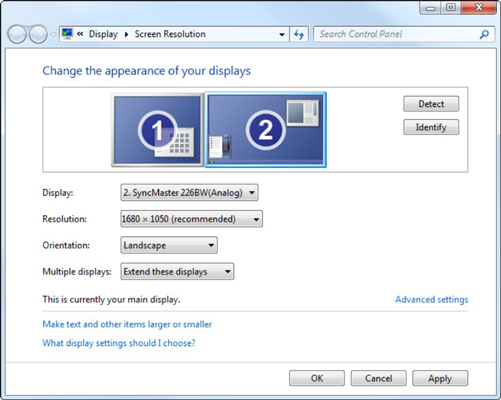
- Right-click anywhere on the desktop and select Screen resolution.
- Select Extend these displays or Duplicate these displays from the Multiple displays drop-down menu and press OK or Apply.
If your monitor does not display your laptop’s output after all these steps, you may need to use the monitor controls to manually switch to the correct input.
Adjust the position of multiple monitors in Windows
Windows places the built-in laptop screen on the left and the external monitor on the right by default. This means you need to move the cursor to the right side of the internal screen when you switch to a monitor. If the opposite is true, you need to adjust the position a bit because the monitor is on the left. If you have Windows 10, do the following steps:
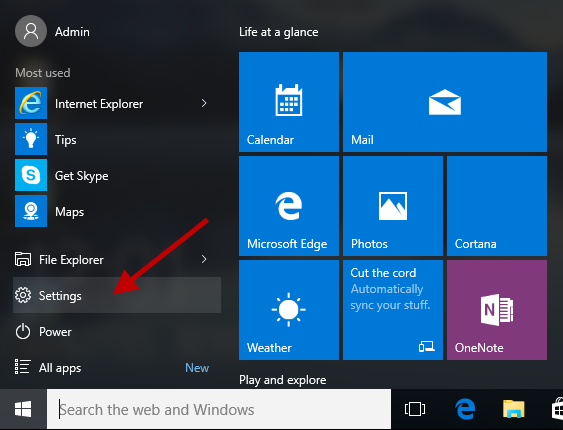
- Click on Start Menu and select Settings (the gear icon at the bottom left);
- Click on System.
- In the pre-selected Display Menu, click on the monitor and slide it into its place. If it is placed to the left of your main screen, position it to the left of the main screen or move it to where it is placed around the main monitor.
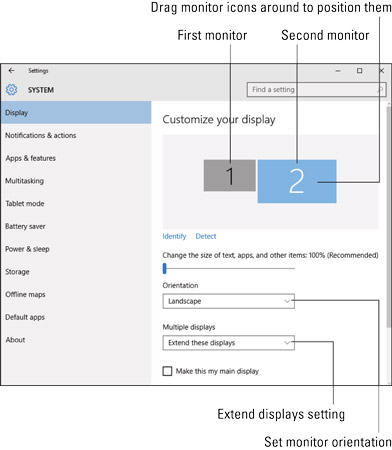
- No other actions are required. Just close the Settings Menu and it’s done.
If you have Windows 7, follow these instructions:
- On your Windows 7 desktop, right-click and select Screen resolution.
- In the appeared dialog box, click and drag the screen icons (screens are numbered) until they are in the correct order/position as they appear in your workspace. Use Identify if necessary.
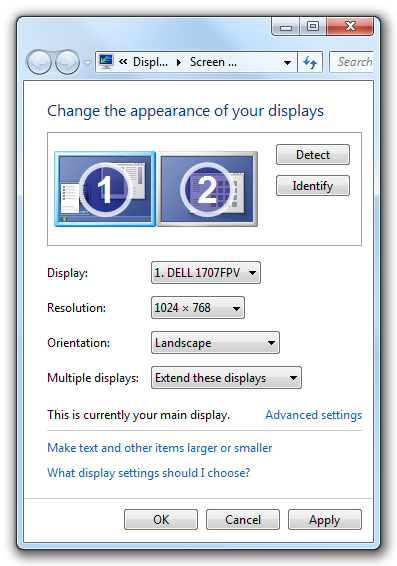
- Select OK or Apply when you’re done.
Windows does not limit you to left and right configurations. You can also position the monitor above or below your laptop. You can also fine-tune the position of the screens to place different windows and other elements on two displays and make them match.
Connect two or more monitors
In many cases, connecting two or more monitors to your laptop is as easy as connecting them to multiple video outputs. Depending on the age of your laptop and the integrated graphics chipset, there may be hardware limitations preventing you from doing this. Older laptops may only support two displays: a laptop display and an additional monitor. Newer models can support up to three external displays. Other devices, such as ultrabooks, hybrids, and tablets, may be limited to having one display output or probably none.
There are several options for devices with a DisplayPort 1.2 connection. First, you can purchase a DisplayPort hub to split one connection into multiple outputs. These splitters are not cheap but they allow you to use the available DisplayPort connection to power two 2560×1600 monitors and a third 1920×1200 display simultaneously. Another option is to buy a daisy-chain monitor: compatible monitors use a DisplayPort output on the back panel, allowing you to connect multiple monitors through a single DisplayPort connection.
Even if you have an older laptop or device with no working video connections, all you need is a spare USB port to add another display. There are many inexpensive USB-DVI, VGA, or HDMI converters, allowing you to add an extra monitor. You may need drivers for Windows 7 and earlier versions but Windows 8 devices should pick them automatically.
What do you need to know about ports?
Although you can still connect your monitor as an additional display, you may find that the screen is stretched or looks more blurry than it should be. Many inexpensive monitors offer WQHD (2560×1440 pixels) or 4K (3840×2160 pixels) resolution, so you should make the right choice to get the best quality on your device.
There is no hard limit on the maximum resolution of a VGA connection but laptop graphics cards often have a maximum resolution of about 2048×1536. It is worth knowing that images may look softer and less sharp through a VGA cable because it is an analog signal but not a digital connection.
The DVI connection is a better choice because it is a digital connection but you still have to be careful. If you want to use resolutions above 1920×1200, you need a dual-channel DVI cable and a dual-channel compatible connector on your laptop.
Likewise, although the HDMI 1.3 standard has added support for monitors and displays beyond the popular Full HD (1920×1080 pixels), and HDMI 1.4 and HDMI 2.0 now support resolutions up to 4K, both your laptop and monitor need to support the connection standard for working. If you have a laptop with an HDMI 1.2 or earlier port, you cannot increase the resolution of the additional monitor above 1920×1200.
DisplayPort is the most flexible connection of all (like USB Type-C, since it is just a medium for a DisplayPort or HDMI connection). Even the older DisplayPort 1.1 standard supports the resolution of up to 4K at 30 Hz. This specification limits the frame rate on the screen to 30 frames per second. So while movies look fine, it is not suitable for 4K gaming. DisplayPort 1.2 adds support for 4K with a smooth 60 Hz refresh rate.
The latest DisplayPort 1.3 standard supports 8K resolution (7680×4320 pixels). Different outputs support different resolutions and refresh rates on some laptops and graphics cards. So it’s worth searching for the most effective connection before you buy any cables or adapters. If you don’t get the right one, you may get a lower resolution and refresh rate generated by a monitor capable of providing better quality.