How to take a screenshot in Windows 10
A screenshot of the screen or its area can be helpful if you need to show someone something on it. It is an image (snapshot) that can be saved on your disc, sent by email, shared on social networks, used in documents, etc. So we’ll show you several ways to take a screenshot in Windows 10.
The standard way (Print Screen key)
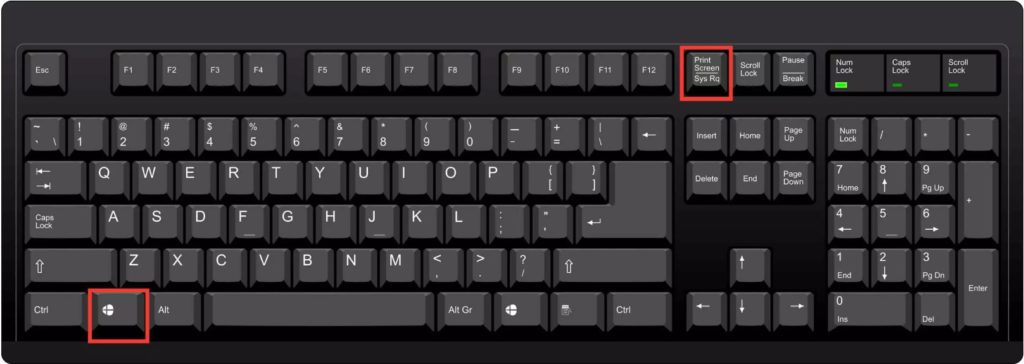
The Print Screen key is the first way to take a screenshot of the desktop or program window in Windows 10. It is usually at the top right of your computer or laptop keyboard. It may also have an abbreviated caption, such as PrtScr.
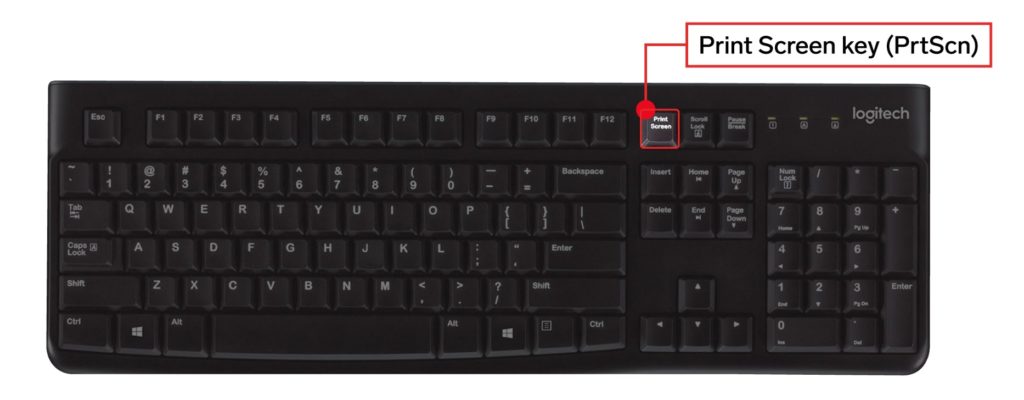
Pressing it puts a screenshot of the entire screen into the clipboard. You can then paste it with the standard Ctrl+V key combination (or with Ctrl+Paste) into a Word document, the Paint editor as an image, and almost any program with support for working with images. If you use the Alt + Print Screen key combination, the screenshot of the active program window is placed in the clipboard.

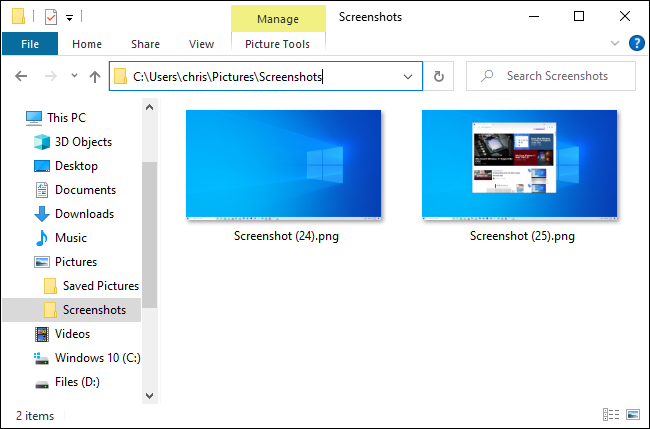
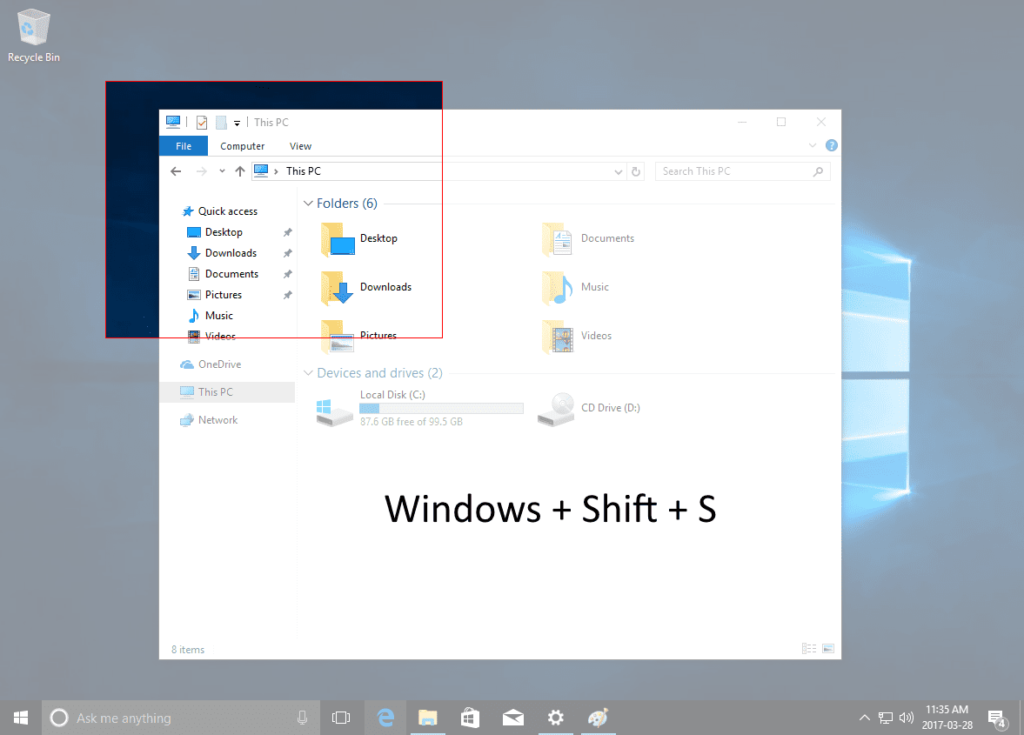
If you want to take a screenshot immediately as an image, you can use the Win + Print Screen key combination in Windows 10. After pressing it, the screenshot is saved in the Images – Screenshots folder. You can change the default folder for saving screenshots.
Using the standard Snipping Tool program
Windows 10 has a standard Snipping Tool program to take screenshots of areas of the screen (or the entire screen), including delayed ones, edit them, and save them in the desired format. Once you start the program, the following options become available for you:
- By clicking on the arrow under Create, you can choose what kind of screenshot you want to take: free-form, rectangle, or the entire screen;
- Under the Hold option, you can set the screenshot to be delayed for a few seconds.
After the screenshot is created, a window with this screenshot opens, and you can add some annotations with the pen and marker, delete some information, and save it (in the File — Save as menu) as an image file of the desired format (PNG, GIF, or JPG).
Using PSR
PSR is a tool for creating instructions. It records all your actions and takes small screenshots. Unfortunately, PSR is not available in all branches of Windows. For example, it is probably unavailable in the Home version.
PSR is useful if you’re trying to explain to a computer specialist what your problem is. This function allows you to record all your actions related to the problem. Or you can create a manual because PSR records all your actions as text and puts screenshots there. In the end, it creates a small archive with all the content.
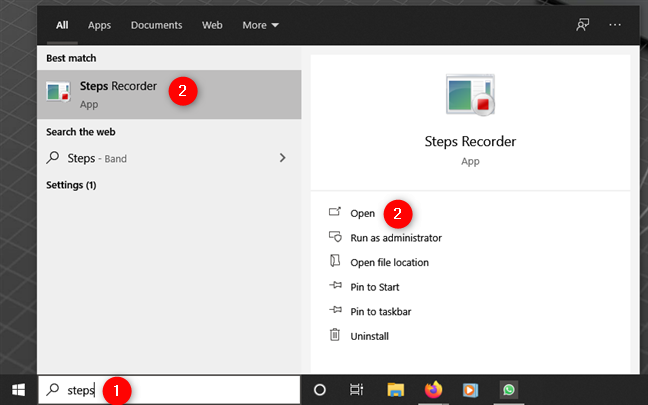
To find this feature, you need to type STEPS in the search box and press Enter. Left-click on Start Recording and stop the recording at the end, and you will get an archive, describing all your actions with screenshots.
Using Microsoft Snip Editor
Snip Editor is a program for Microsoft where you can take a screenshot in Windows 10 and edit it. This program is designed to replace the standard Snipping Tool. At the same time, Snip Editor has more advanced functionality, and its interface is optimized for touch screens.
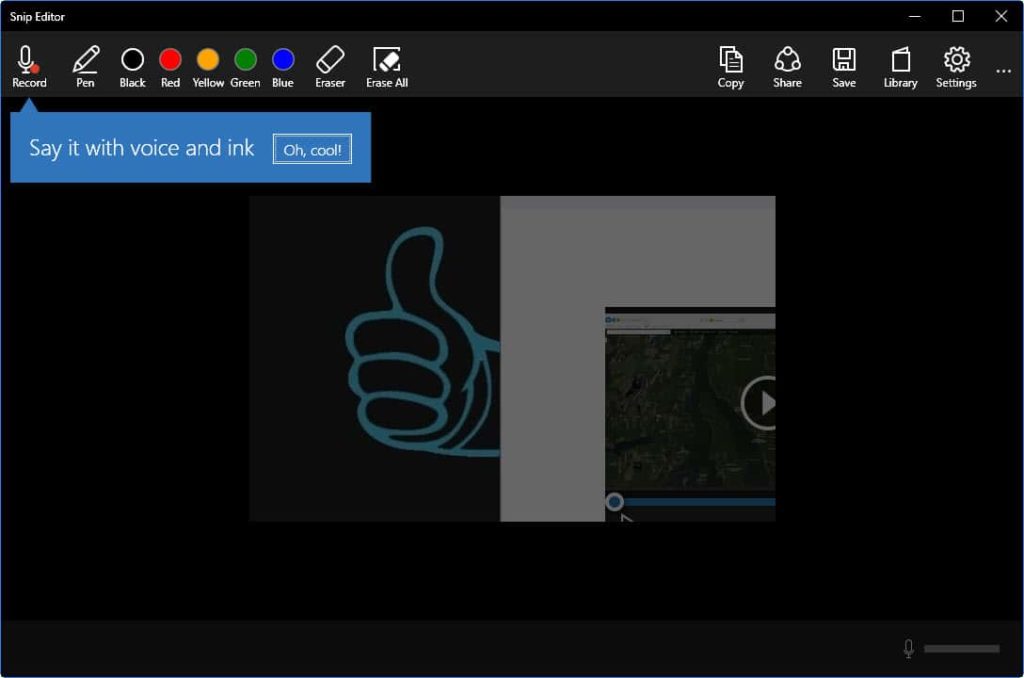
After downloading, run the installation file and install the program. The icon will be on the notification panel, and a small panel will be placed on the edge of the screen (it can be moved). Hover your mouse over this panel, and you will see three big buttons: Take a Screenshot, Open the Editor, and Start the Webcam. Select the desired area or press Enter to take a screenshot of the entire screen. You can also open the program with the Print Screen button. The created screenshot will be immediately opened in the editor.
Using the Lightshot program
This program is straightforward. Since it requires minimal resources, you can add it to your autostart list so that you don’t have to open it every time you need it. The application is linked to the PrintScreen key. After pressing it, the screen darkens a bit, and you should use a mouse cursor to select the light area and save it as a screenshot. The program menu appears after selecting an image. Press the floppy button and select the desired folder to save a screenshot.

Despite its minimalistic design, the program has advanced functionality. You can use it to mark the screenshot with a marker of any color, upload it to the cloud, share it on social networks, and search for similar images on Google.
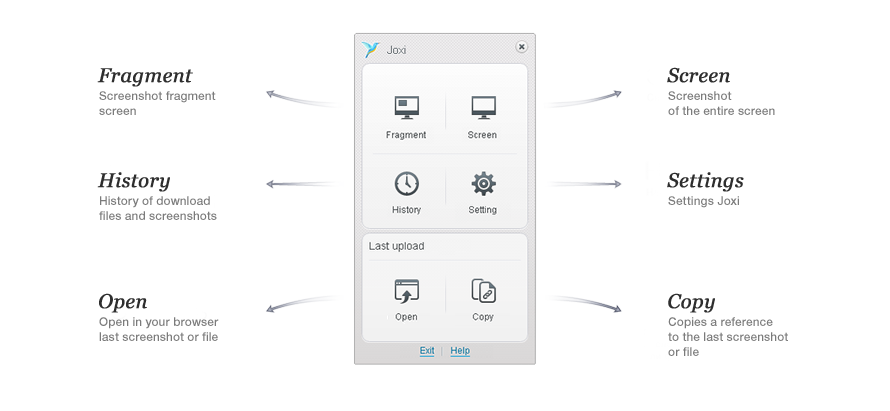
Using the Joxi program
This is one more user-friendly program for Windows, distributed for free like Lightshot. It allows you to include the application in the autostart, set the default folder where the screenshots will be saved, and so on. You can also select a hotkey to take a screenshot of the selected area or the entire screen. Moreover, the program allows you to set keyboard shortcuts and publish a screenshot on Twitter or Facebook or send it via email in one click. The program menu, like in Lightshot, appears when the user selects the desired area of the screen or takes a screenshot of the entire screen.

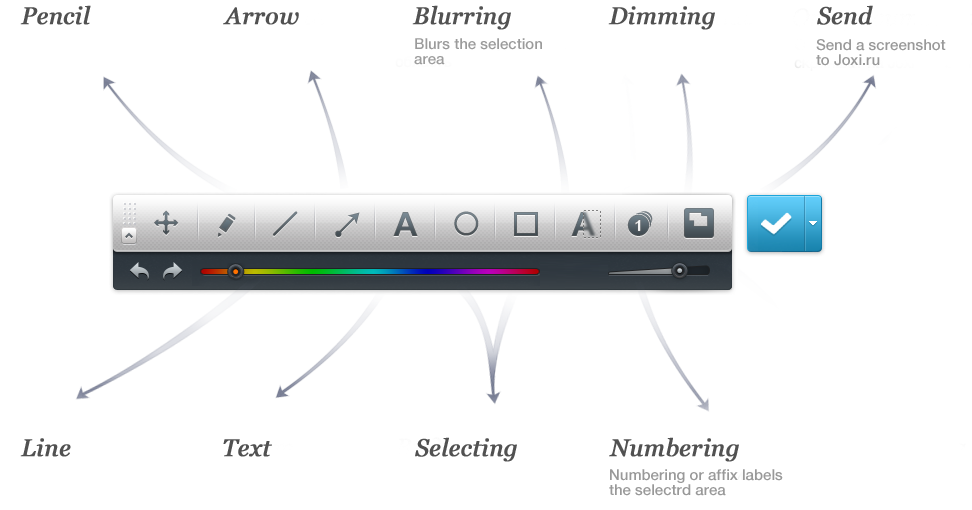
Joxi has numerous functions for editing images. The program interface is intuitive, so no step-by-step instructions are required. You can circle a separate fragment or enclose it in a square frame in the desired color, point to the desired object with an arrow, blur selected areas, or number objects with a few mouse clicks.