How to reinstall Realtek HD Audio Manager on Windows 10/11
Realtek HD Audio Manager is a popular application to configure sound settings on Windows computers. Realtek HD Audio Manager has been a perfect place to improve overall sound quality for many users. But sometimes, the application disappears or doesn’t work on Windows 10 and 11. If you encounter such a problem, we will try to help you.
What is Realtek HD Audio Manager?
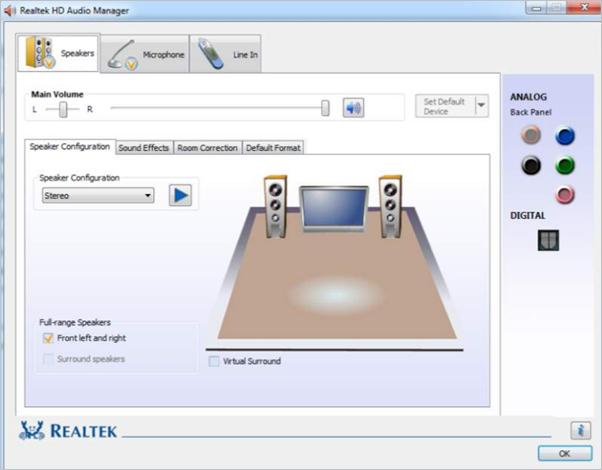
Realtek HD Audio Manager is an advanced application to configure various sound settings. Realtek HD Audio Manager is familiar on Windows computers because most have a Realtek sound card. In addition to hardware, Realtek also provides an audio driver and the Realtek HD Audio Manager application to manage the sound setup.
What’s excellent about Realtek HD Audio Manager? First, you can enhance the sound with an equalizer, mixer, and preset sound profiles. You can even create your sound profile. Later, you can enable features like noise reduction and echo cancellation. The app also allows you to enable multistream playback to stream multiple audios to different output devices at the same time. Overall, Realtek HD Audio Manager is a great utility, and if you’re a music lover, you should use it more often. Now let’s look at some common problems Realtek HD Audio Manager users encounter and find out how to fix them.
How to download Realtek HD Audio Manager for Windows 10/11?
Microsoft has cut many extra utilities on Windows 10 to make this OS minimalistic and lightweight. But longtime Windows users are not happy with it. However, if you want to access Realtek HD Audio Manager in Windows 10, you don’t need to download anything because the app is already installed but hidden from direct user access. You can access it by following these steps:
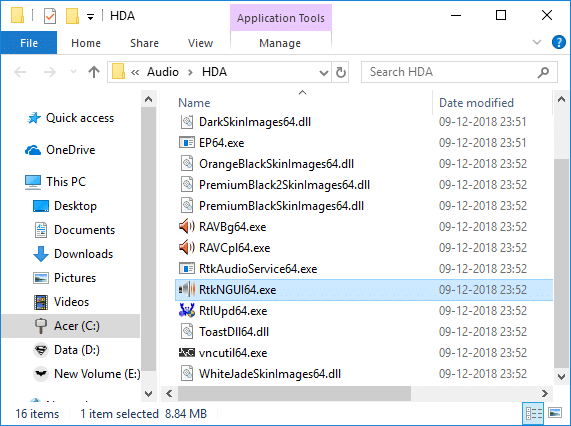
- Open the C drive or the drive where your OS is installed. Then go to Program Files -> Realtek -> Audio -> HDA. Here you will find “RtkNGUI64“. Open it.
- After that, Realtek HD Audio Manager will be opened. Now you can adjust the music as you like.
- Also, if you want to use Realtek HD Audio Manager regularly, just right-click on “RtkNGUI64” and send it to Desktop.
If “RtkNGUI64” or the Realtek folder does not exist on the OS disk, go to the next section to fix it.
How to install the audio driver?
In most cases, Realtek HD Audio Manager is missing because the audio driver is not installed properly on your computer. Therefore, follow these steps to install a special Realtek driver for your sound card:
- Right-click the Start button in Windows and open Device Manager;

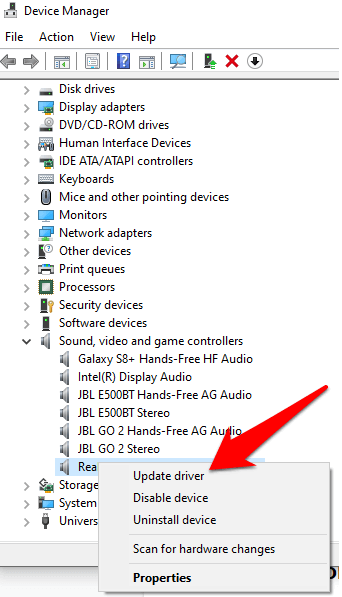
- Double-click “Audio Inputs and Outputs.” Right-click on “Speaker / Headphone” (2- Realtek High Definition Audio) and select “Update Driver“. It remains the same if it shows “High Definition Audio Device.”
- Click “Search automatically for updated driver software” on the next screen. Your computer will now find the driver online and install it after that.
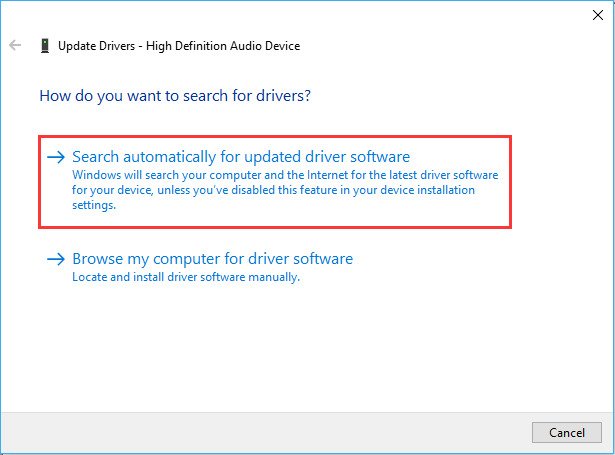
- The installation will be complete in a few minutes. Now restart your computer and go to the Realtek folder, as we mentioned in the previous section, and you will find Realtek HD Audio Manager.
How to update the Realtek HD Audio Driver manually?
Sometimes the automatic driver update from the Microsoft server does not work correctly. In such cases, you have to install the drivers manually:
- Open the Device Manager again and right-click on the “Speaker / Headphone” (2- Realtek High Definition Audio) or “High Definition Audio Device.” Click on “Update Driver” here.

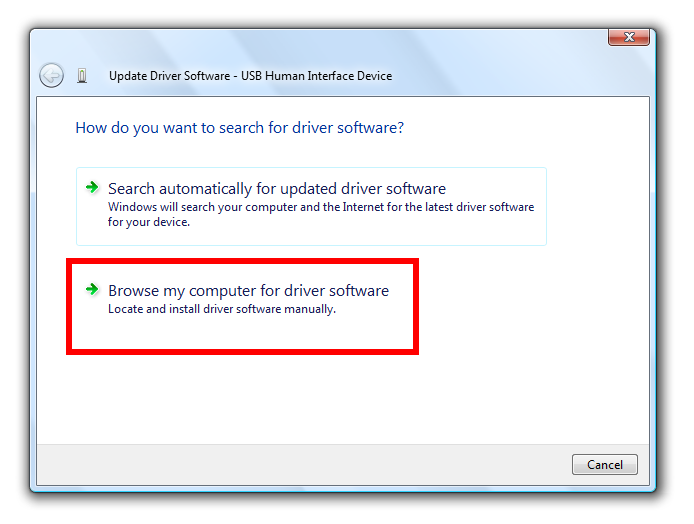
- After that, select “Browse my computer for driver software.”
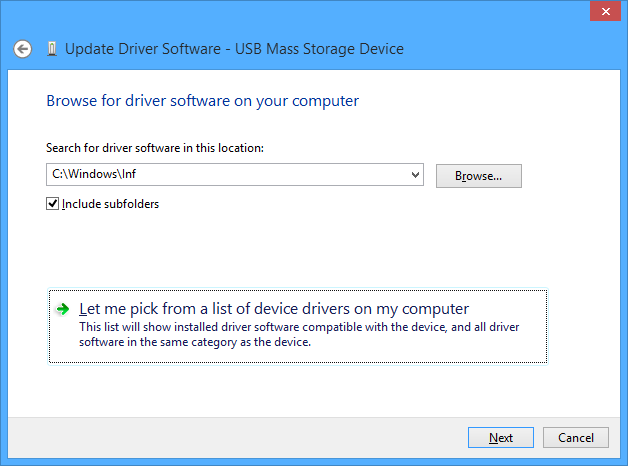
- Click “Let me pick from…” at the bottom of the next window.
- Select “Audio Endpoint‘ or Realtek HD Audio Driver and click on Next.
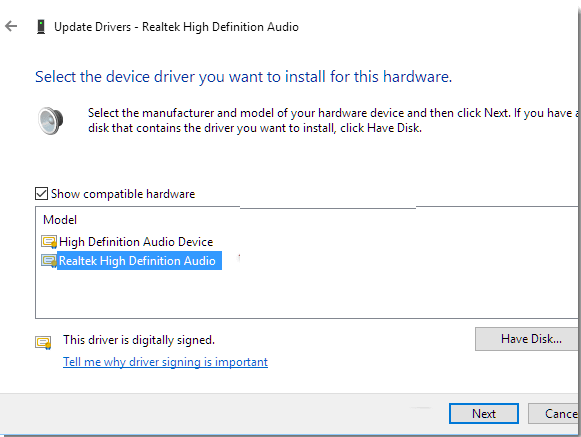
- Finally, the audio drivers will be updated to the latest version.
- If Realtek HD Audio Manager is still not working, you can download the drivers manually from the Windows Update directory. Click this link and download the latest version based on your Windows 10 version. After that, unzip the CAB file using WinRAR or 7-Zip.
- To find the version for Windows 10/11, press the “Windows” and “I” keys and go to System -> switch to the “About” tab below -> scroll down, and find “Windows specifications.“
- After downloading the driver, go to step 3 again and click “Have Disc...”.
- Click on “Browse” and find the extracted CAB folder.
- Select the first INF file and click on “Open.” The audio driver will be installed instantly. Now reboot your computer, and you will see Realtek HD Audio Manager.
Alternative ways to install the Realtek HD Audio Driver
Although you can update the Realtek audio driver from the Device Manager, there are other ways to do that in a few clicks. For example, you can download the audio driver from your motherboard manufacturer’s website. You will be sure that the audio driver is correct and will enable Realtek HD Audio Manager. The file is usually in the EXE format, so you just need to run it and install it as a standard Windows application.