Easy way to take a Screenshot on a Dell Laptop
Taking screenshots on your Dell laptop is an easy way to capture any information quickly and easily. With just a few simple steps, you’ll be able to grab whatever images or text you need in.
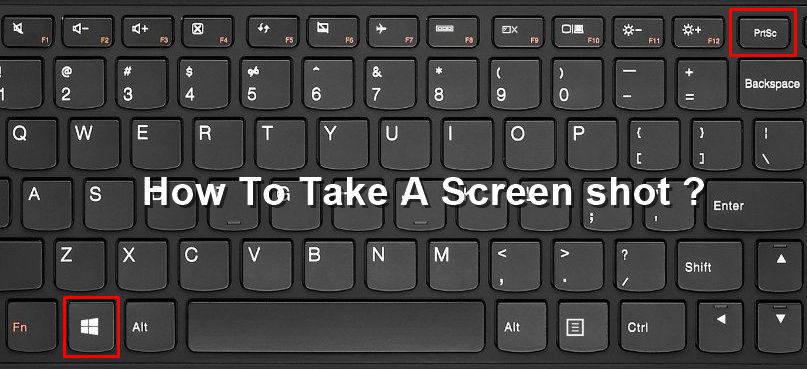
Table of Contents
- Make Screenshot on a Dell Laptop
- Windows Snipping Tool
- In conclusion
Make Screenshot on a Dell Laptop
Here are the steps to take a screenshot:
- Press the “Windows” key and “PrtScn” (Print Screen) at the same time on your keyboard. This will capture an image of your entire screen and save it to the Pictures > Screenshots folder in your computer’s file directory.
- To capture a specific area of your screen, press “Windows”, “Shift” and “S” at the same time. This will bring up a crosshair cursor that you can use to select the area of your screen you wish to capture. When you’ve finished selecting, the screenshot will be saved in the same folder as above.
- To capture a single window or application from your desktop, press “Alt” and “PrtScn” at the same time on your keyboard. This will capture the active window and send it to your clipboard, where you can paste it into a document or image editor.
Do you want to find where the screenshot was saved? It will likely appear as a file in your Pictures folder with a filename beginning with “Screenshot” followed by a number and ending with the file extension .png or .jpg. Once there, you can open the image file and view or edit it as desired.
Lastly, if you want to copy the screenshot directly to your clipboard so that you can paste it into another program such as Word or Photoshop, press and hold the “CTRL” key while pressing the “PrtSc” key. Then simply use the paste command in whatever program you wish to insert the screenshot into. And that’s all there is to taking a screenshot on a Dell laptop! It really is an easy process once you get the hang of it.
Windows Snipping Tool
If you need to annotate your screenshots or draw on them before saving, use the built-in Windows Snipping Tool. To access this, simply type “Snipping tool” into your Start Menu’s search bar and click to launch it. Once open, click the dropdown arrow next to “New” and select which kind of snip you would like to take (free-form, rectangular, window, or full screen). After selecting what you want to screenshot, add arrows and text with the pencil tool before saving it as an image file.
In conclusion
With our simple steps and tools at your disposal, taking a screenshot on a Dell laptop is quickly processed. Make it easy by yourself!